| File->New->Android | Project Name | Project Config | Icon Config | Blank Activity | Activity Name |
|---|---|---|---|---|---|
 |
 |
 |
 |
This sections shows how to setup the AngryBirdApp demo in Eclipse. It assumes that the Android SDK and Android plug-ins for Eclipse are already installed.
Note that these steps are not related to the CS1 Android library, but are needed for any Android project. Also, these steps are done only once per project.
The instructions are for Eclipse Kepler and the CS1 Android library has been compiled with Java 1.7.0_25, although other Eclipse and Java versions will likely work as well.
The images below are clickable and will be shown in higher resolution.
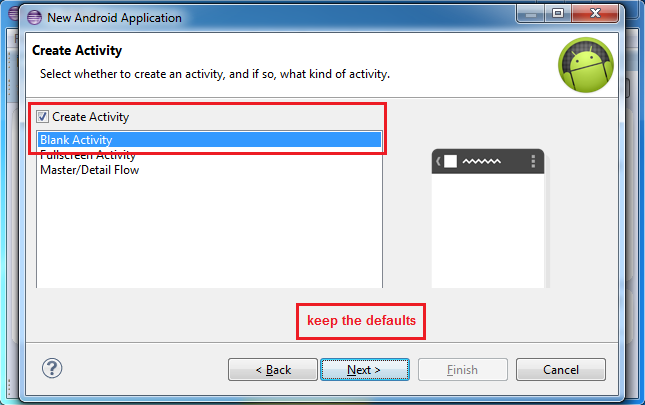
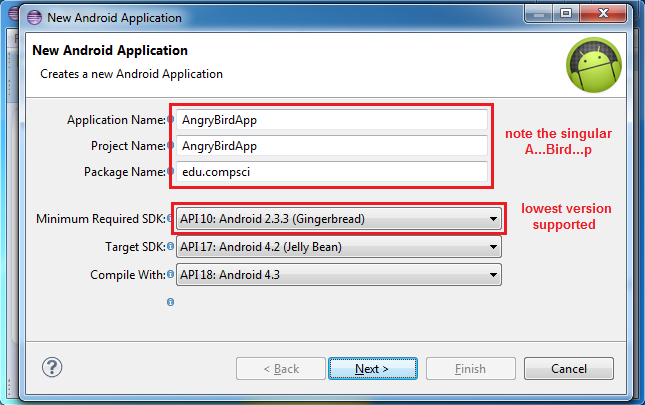
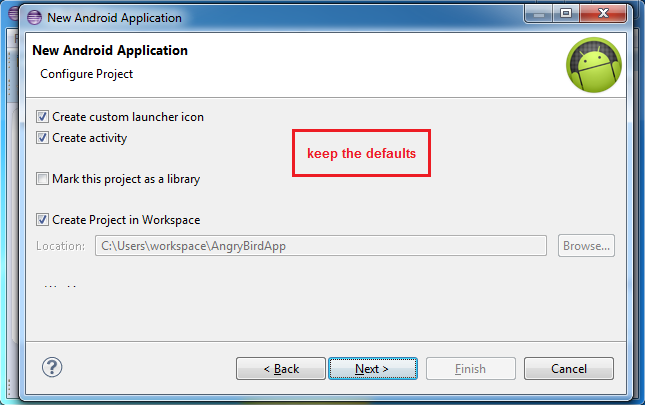
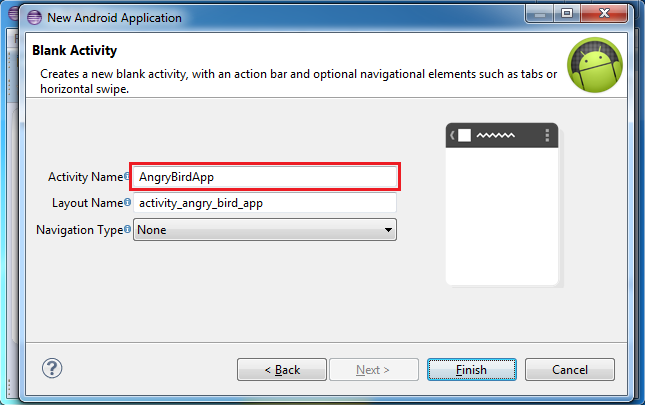
This is a 5-step process -- in 3 of the steps you simply accept the defaults; in 2 of the steps you just need to type the name of the project in the dialog box.
Click each of the images to see what information needs to be filled in. In this example the project name is AngryBirdApp (note the singular ...Bird...):
| File->New->Android | Project Name | Project Config | Icon Config | Blank Activity | Activity Name |
|---|---|---|---|---|---|
|
|
|
|
 |
<activity
    android:name="cs1.android.AndroidAppCanvas"
    android:label="@string/app_name"
    android:screenOrientation="landscape" >
</activity>
|
Note: If the project requires portrait orientation replace screenOrientation="landscape" with screenOrientation="portrait"
Note: Once the emulator is running hitting Ctrl+F11 will rotate the emulator back and forth between portrait and landscape orientation.
Outside Eclipse use your system's file browser to copy the file cs1android.jar to the libs/ folder of the project created by Eclipse.
After the library has been copied, inside Eclipse right-click on the project name and select Refresh to make sure that cs1android.jar is loaded in the libs/ folder:
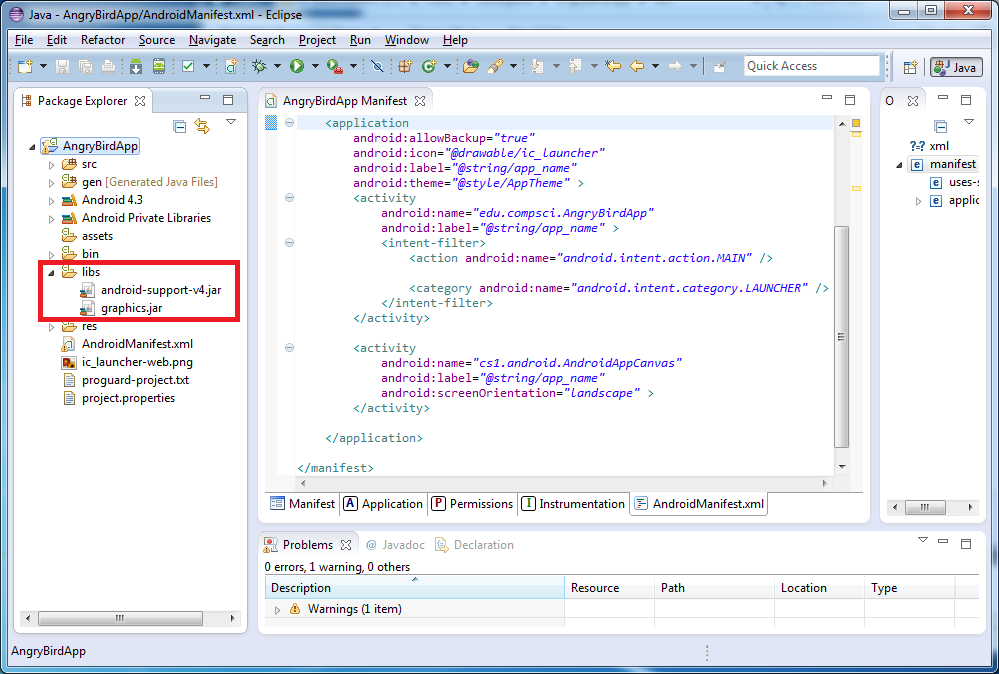
Note: If you do not Refresh the project, the CS1 Android library will not be loaded and you will receive compilation errors related to the library.
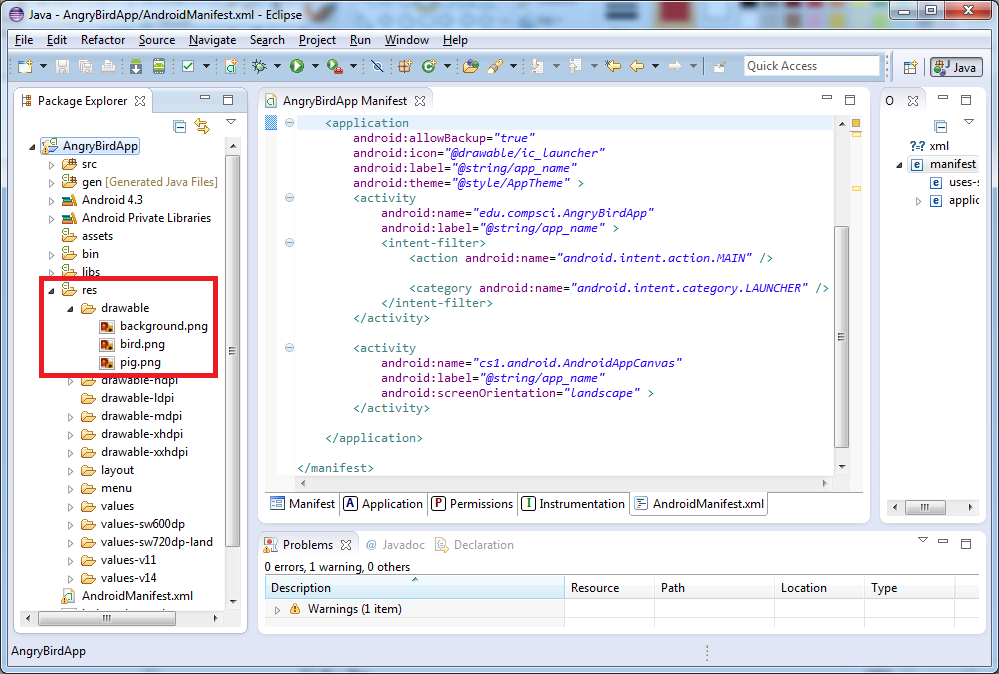
If the project has images, they need to be placed in the res/drawable/ folder of your project. If the res/ folder does not have a drawable/ folder, create one.
For the AngryBirdApp example, outside Eclipse use your system's file browser to copy the drawable folder provided here to the res/ folder of the project created by Eclipse.
After the drawable folder has been copied, inside Eclipse right-click on the project name and select Refresh to make sure that the drawable folder is visible in the res/ folder:
Inside Eclipse, open the file AngryBirdApp.java and overwrite it with the code from AngryBirdApp.java.
Compile, run, and enjoy!